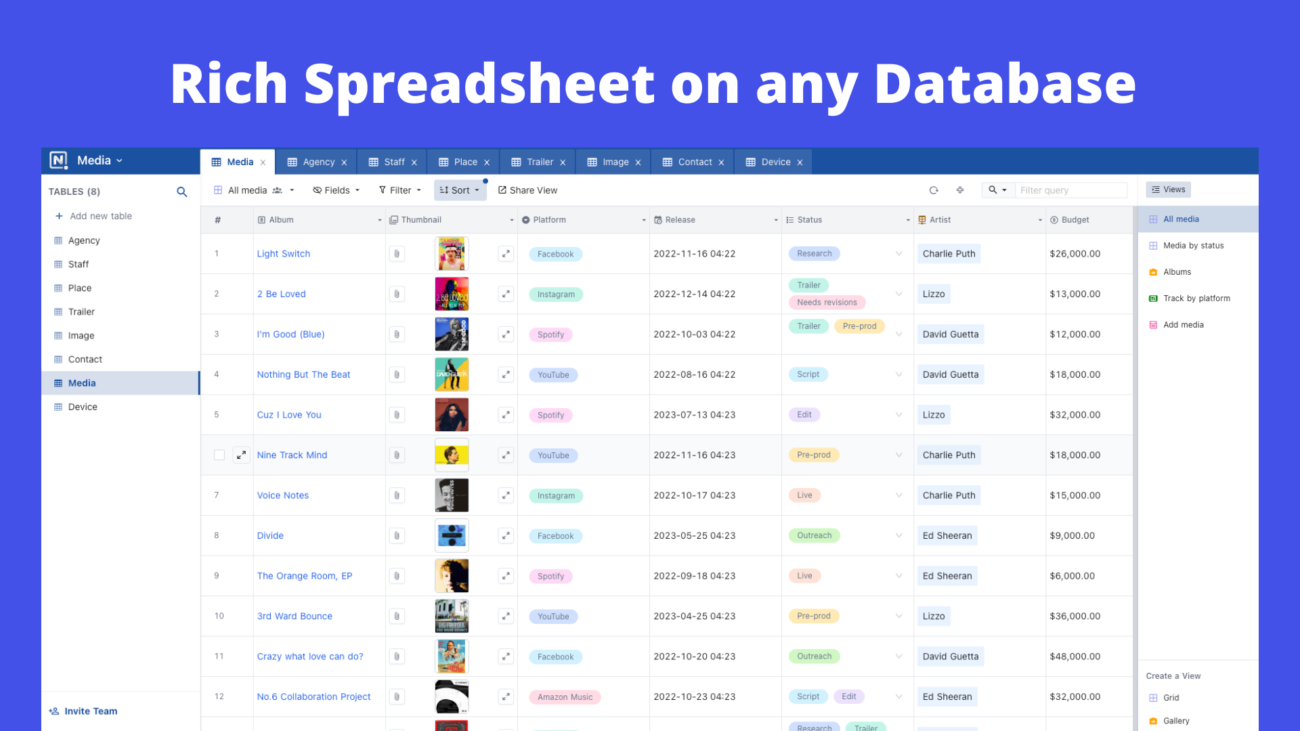
Interacting with your MySQL database could be as simple as interacting with a spreadsheet. Interested? Read on. In this blog, I explore NocoDB an open source alternative to Airtable. Simply put, we will interact with our MySQL database as if it’s a spreadsheet and try to see what features it provides. Not only MySQL, but you can also connect with MSSQL, Postgres, and Sqlite as well.

NocoDB installation can be local or remote and the same goes for the database.
To check the remote functionality, I installed NocoDB on 1 server using installation instructions and MySQL on another server.
Once your install NocoDB, you will see an executable file like this:
-rwxr-xr-x. 1 root root 144955486 Jul 9 14:52 nocodbBefore executing the above file, open up port 8080, if you are planning to make your public IP access the NocoDB application. Once you execute the above binary, you will see something like this:
root@abc-vm]./nocodb
....
....
[Nest] 84020  - 07/09/2023, 6:27:02 PM     LOG [RouterExplorer] Mapped {/api/v1/db/public/shared-view/:publicDataUuid/rows/export/excel, GET} route +0ms
[Nest] 84020  - 07/09/2023, 6:27:02 PM     LOG [RouterExplorer] Mapped {/api/v1/db/public/shared-view/:publicDataUuid/rows/export/csv, GET} route +0ms
[Nest] 84020  - 07/09/2023, 6:27:02 PM     LOG [RoutesResolver] h {/}: +0ms
[Nest] 84020  - 07/09/2023, 6:27:02 PM     LOG [RouterExplorer] Mapped {/api/v1/db/meta/duplicate/:projectId/:baseId?, POST} route +0ms
[Nest] 84020  - 07/09/2023, 6:27:02 PM     LOG [RouterExplorer] Mapped {/api/v1/db/meta/duplicate/:projectId/table/:modelId, POST} route +0ms
[Nest] 84020  - 07/09/2023, 6:27:02 PM     LOG [RoutesResolver] p {/}: +0ms
[Nest] 84020  - 07/09/2023, 6:27:02 PM     LOG [RouterExplorer] Mapped {/api/v1/db/meta/import/airtable, POST} route +1ms
[Nest] 84020  - 07/09/2023, 6:27:02 PM     LOG [RouterExplorer] Mapped {/api/v1/db/meta/syncs/:syncId/trigger, POST} route +0ms
[Nest] 84020  - 07/09/2023, 6:27:02 PM     LOG [RouterExplorer] Mapped {/api/v1/db/meta/syncs/:syncId/abort, POST} route +0ms
[Nest] 84020  - 07/09/2023, 6:27:02 PM     LOG [NestApplication] Nest application successfully started +6ms
Visit : localhost:8080/dashboard
This is how your dashboard will look like this:
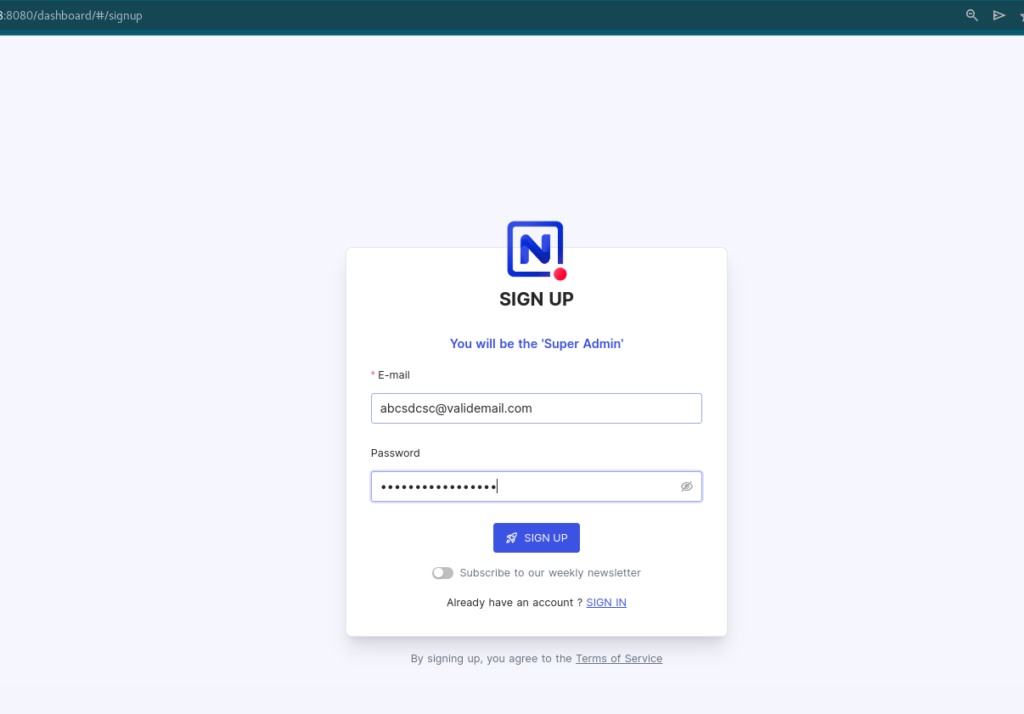
Once you sign up using your email id and password, you will be seeing this:
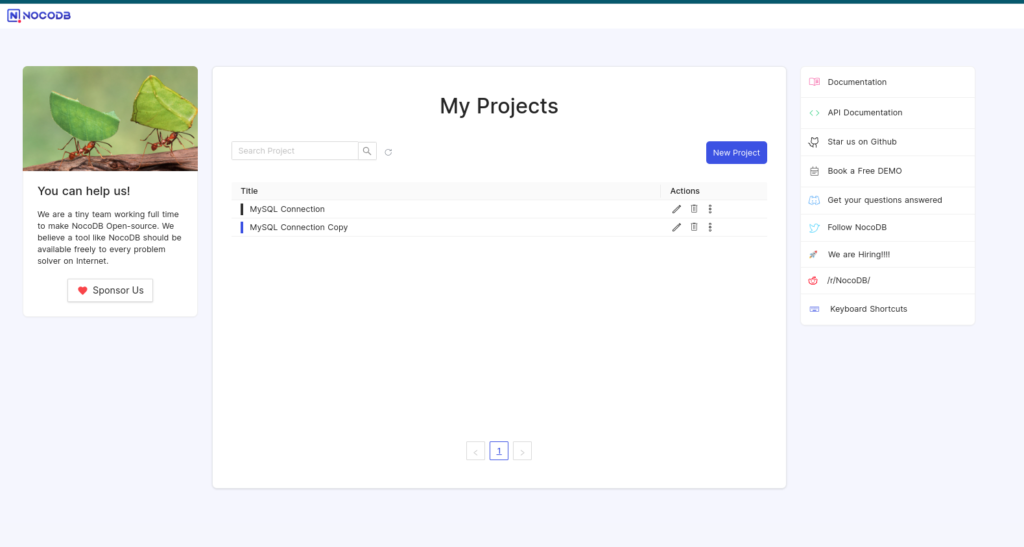
Click on the “New Project” button and give the desired name. I have created a project named “MySQL connection”. Click on the freshly made project. On the left-hand side, Click on the 3 dots next to “Add new table” like this:
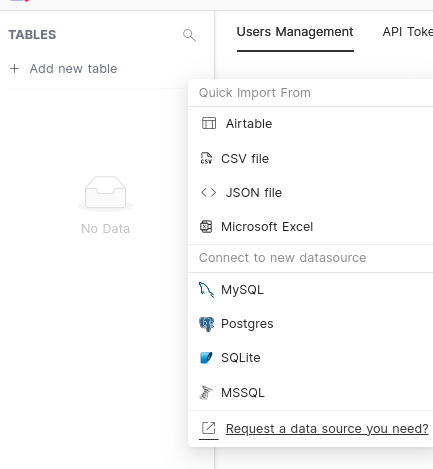
Clicking on the “MySQL” option will take you to the Data Sources, click on “New”:

Fill up the following details:
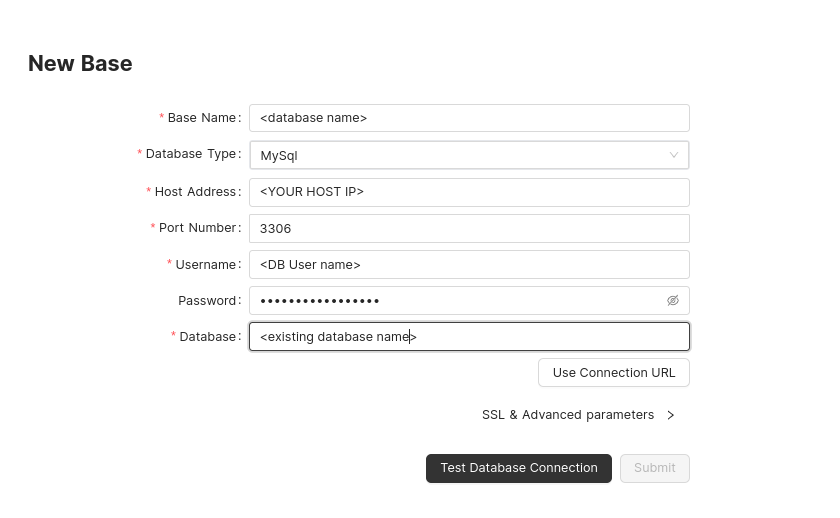
Two things to note:
1. The username which you specify for accessing the database should have sufficient privileges. See this Stackoverflow thread for more details.
2. In the database field, if you specify an existing database, it will not overwrite it.
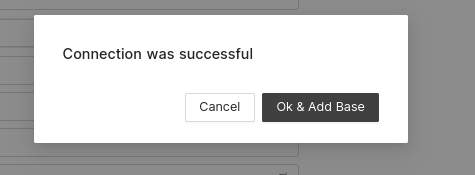
Click on Test Database Connection will show this pop-up. Click “Ok & Add Base”
I created a sample table as a spreadsheet on nocodb as follows:
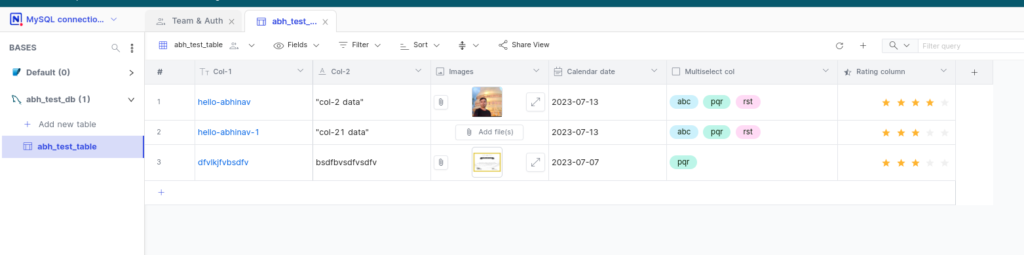
Checking in MySQL CLI shows something like this:
mysql> select * from abh_test_table\G
*************************** 1. row ***************************
             id: 1
          Col-1: hello-abhinav
     created_at: 2023-07-09 16:29:23
     updated_at: 2023-07-09 18:54:55
          Col-2: "col-2 data"
         Images: [{"path":"download/noco/MySQL connection copy/abh_test_table/Images/MGAX7RbQDNa81EAemm.jpeg","title":"1604731838443 (1).jpeg","mimetype":"image/jpeg","size":107076}]
  Calendar date: 2023-07-13
Multiselect col: abc,pqr,rst
  Rating column: 4
*************************** 2. row ***************************
             id: 2
          Col-1: hello-abhinav-1
     created_at: 2023-07-09 18:54:19
     updated_at: 2023-07-09 18:55:02
          Col-2: "col-21 data"
         Images: NULL
  Calendar date: 2023-07-13
Multiselect col: abc,pqr,rst
  Rating column: 3
*************************** 3. row ***************************
             id: 3
          Col-1: dfvlkjfvbsdfv
     created_at: 2023-07-09 18:55:03
     updated_at: 2023-07-09 18:55:32
          Col-2: bsdfbvsdfvsdfv
         Images: [{"path":"download/noco/MySQL connection copy/abh_test_table/Images/0PwtJ06CHgcHf0ygAu.jpg","title":"OSI-Certificate-2018.jpg","mimetype":"image/jpeg","size":348733}]
  Calendar date: 2023-07-07
Multiselect col: pqr
  Rating column: 3
3 rows in set (0.00 sec)
mysql>
The feature which I liked the most is you can create Swagger APIs for your tables at the click of a button. To do that, click on the name of the project you created.
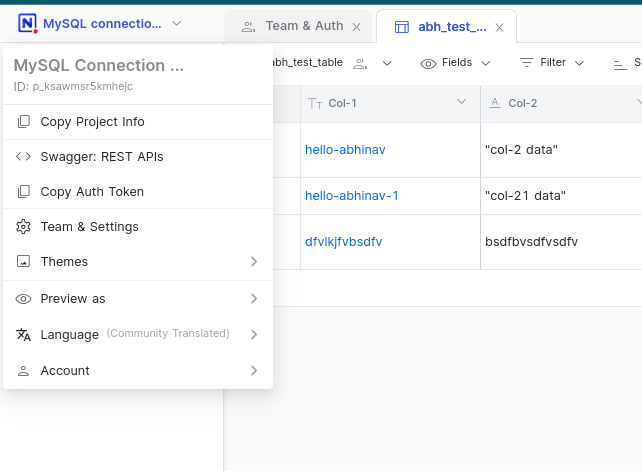
Click on “Copy Auth Token” and then Click on “Swagger: REST APIs” which will take to you to a new tab like this:
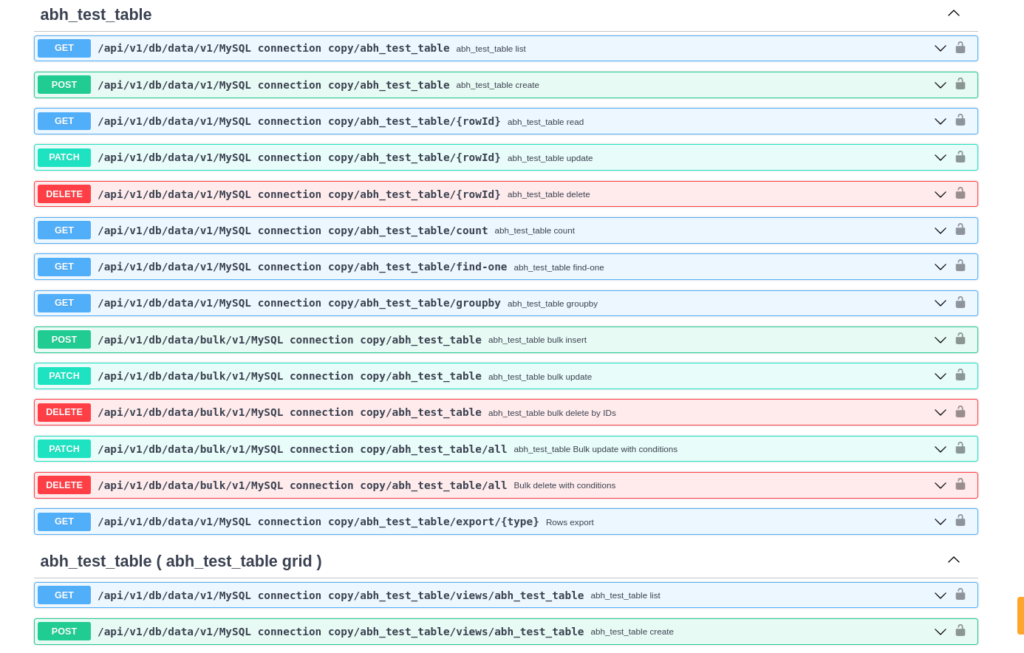
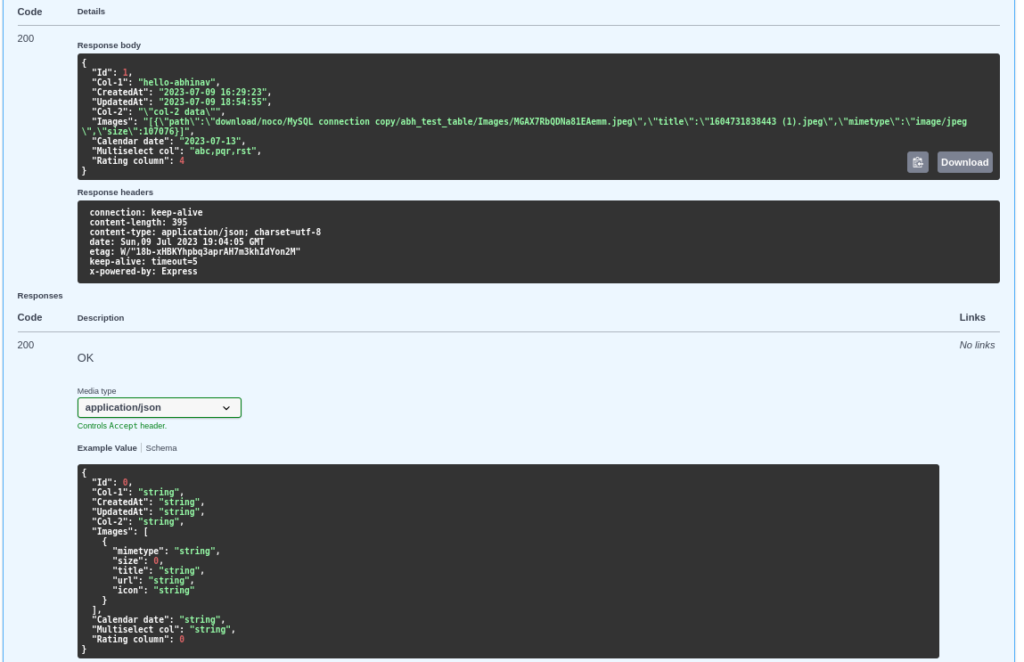
Sample execution of one of the REST APIs on generated Swagger interface:
A couple of other notable features:
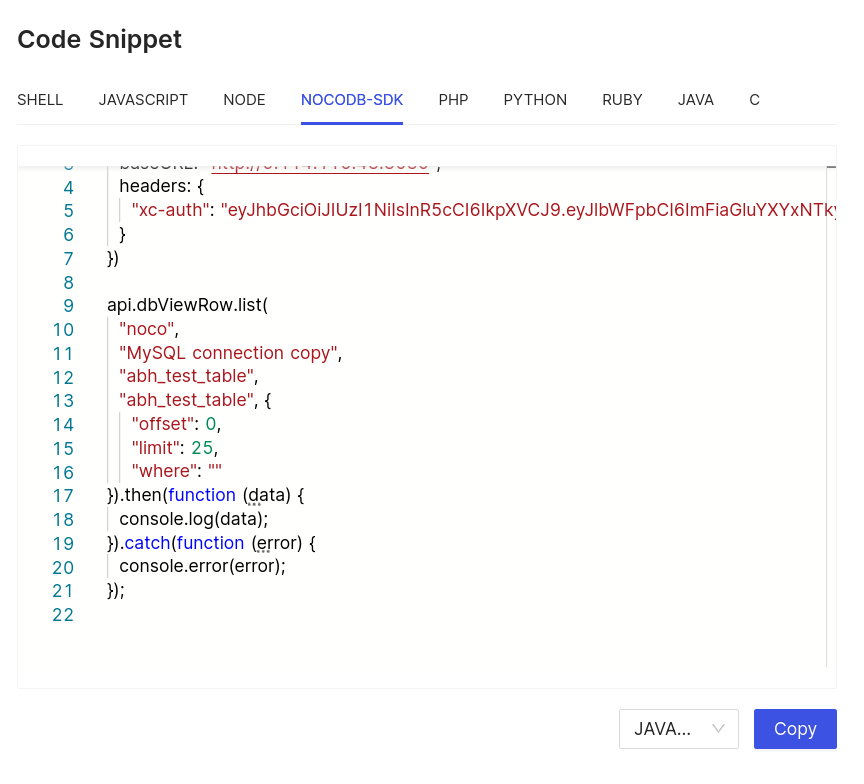
- Get API snippets directly for your data: In Java, Javascript, PHP, C, Python, and Bash !!
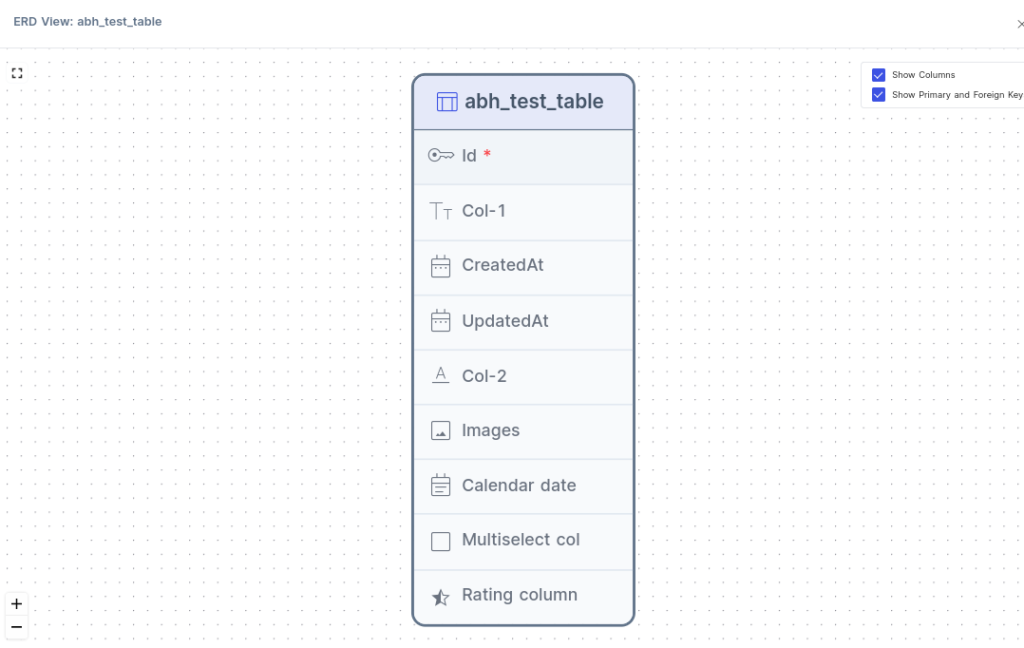
- ERD View of your database: Don’t we all want that?
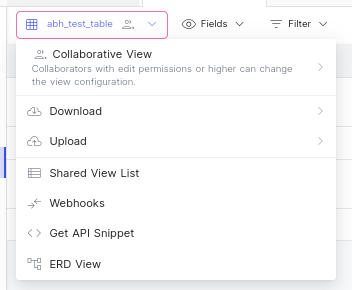
Click on “Get API Snippet” will take you to this:
Similarly clicking on “ERD Diagram” shows this:
There are other features like Adding Webhooks, Inviting Collaborators, etc. which I have not explored.
Drawbacks:
- If you have multiple databases within a single installation, this tool either has a bug or not having the option of adding those databases as data sources. This was surprising to me as why would you not allow that?
- I would not take this and try to connect to an existing production DB, instead, I would first create a copy of the DB and try to connect to it.
- MongoDB support?
Nevertheless, drawbacks bring opportunities for open-source contributions!
It was fun exploring this tool and writing this one, see you next time!